Using devkitARM and libnds with Visual Studio 2005
I’m primarily a Linux user, as such I do almost all of my development in Linux either using gVim or KDevelop. Despite my affinity for the aforementioned IDEs and OS I would still be hard pressed to find an IDE better than Microsoft Visual Studio 2005.
This being said, using Visual Studio 2005 with devkitARM and libnds is both simple and a joy. The setup procedure can seem a little daunting (especially if you’ve never had to configure your own Visual Studio project before) but it’s not too bad.
Note: The NDS Example files do come with a Visual C++ project which can be imported, and can be used as a good building block to start a full solution from, however, if we did that we wouldn’t learn anything. ;)
First follow the instructions for creating a template based project.
In order to create a solution you’re going to have to open Visual Studio and import our existing template as a project. Luckily for us Microsoft Visual Studio 2005 has a nifty wizard which will help us with just that.
Click the “File” menu, select “New”, and click “Project from Existing Code…”.
You will be presented with the dialog shown below. You’re going to want to select Visual C++ project as the type and click next.

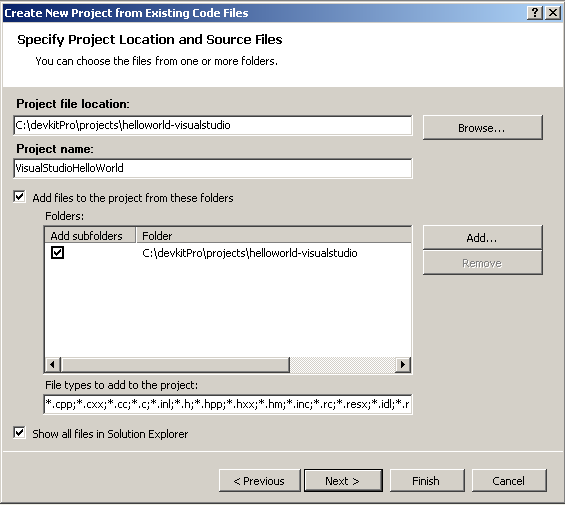
The next screen allows us to select our project name and directory. Choose the project template directory mentioned earlier as the project directory, ensure that “Add files to the project from these folders” is checked. The project wizard will automatically add the project directory to the list of directories to populate the project with.
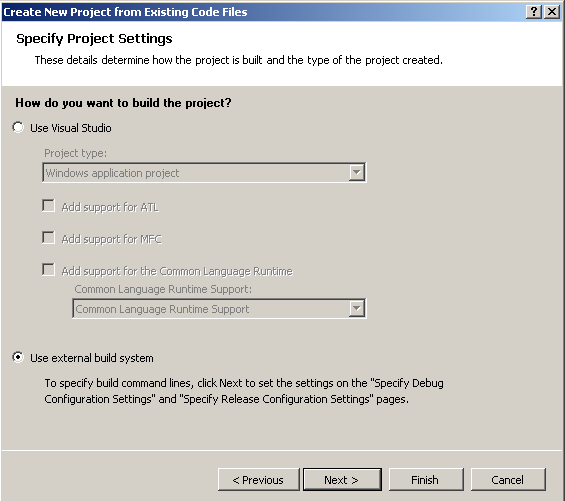
Next we get to chose our build system. Make sure to chose external make system and select next.
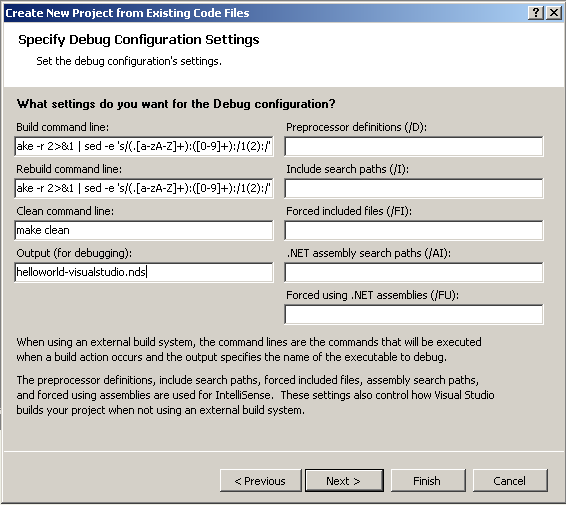
This screen is where the build magic happens. Lucky for us the amazing people over at devkitPro. org have already devised a simple make/sed combo which will allow the make output to be interpreted by visual studio as error reports it can understand.
| The string is: make -r 2>&1 | sed -e ‘s/(.[a-zA-Z]+):([0-9]+):/1(2):/’This string should be used as both the build command line, as well as the rebuild command line. Use “make clean” for the clean command line. Finally use the name of the project directory with .nds at the end as the Debugging output. |
Click next, select same as Debug settings, and click finish!
You should now have a working project solution!
You can now build your project and watch as Visual Studio chugs along and builds with our magic build command line. This is fine and dandy, but after a little development you’ll notice that IntelliSense (Microsoft’s proprietary code-completion) doesn’t completely work. In addition you have no way to effectively debug the Nintendo DS applications that have been built.
With a little bit of project configuration you can make IntelliSense work and cause debugging to launch your application in your emulator of choice.
Configuring IntelliSense
To configure IntelliSense you’ll need to add your devkitARM and libnds directories to both the project include directory list.
To get to the list, right click the project icon ( it will be located under the solution in the “Solution Explorer” sidebar ) and select “Properties”.
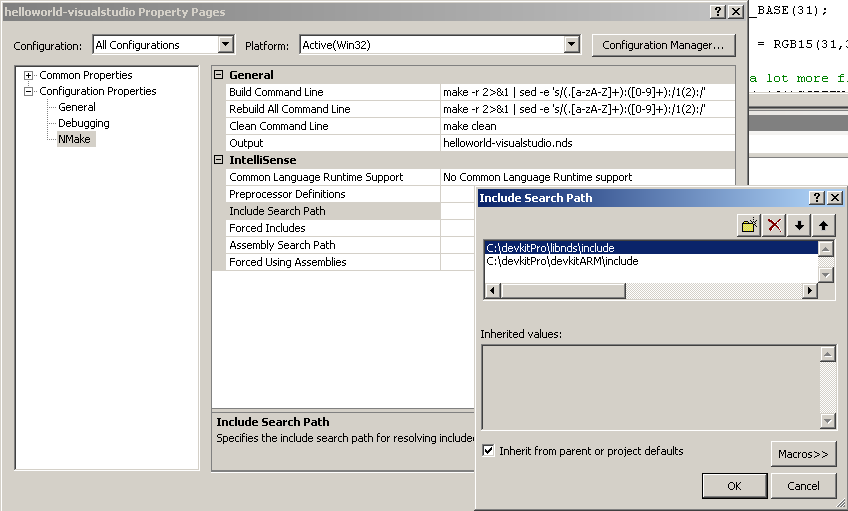
Once inside of the properties window make sure to select “All Configurations” from the configurations drop-down. Not doing so will cause the changes only to be applied to the Debug release, and changing the setting to Release will produce unexpected results.
Executing your emulator of choice on application debugging
Select the “NMake” category under “Configuration Properties” and select “Include Search Path”. Clicking “Include Search Path” should make a “…” button visible. Click the “…” to open the Include Search Path edit dialog. Add your Devkit Pro directories to the search path and click ok.
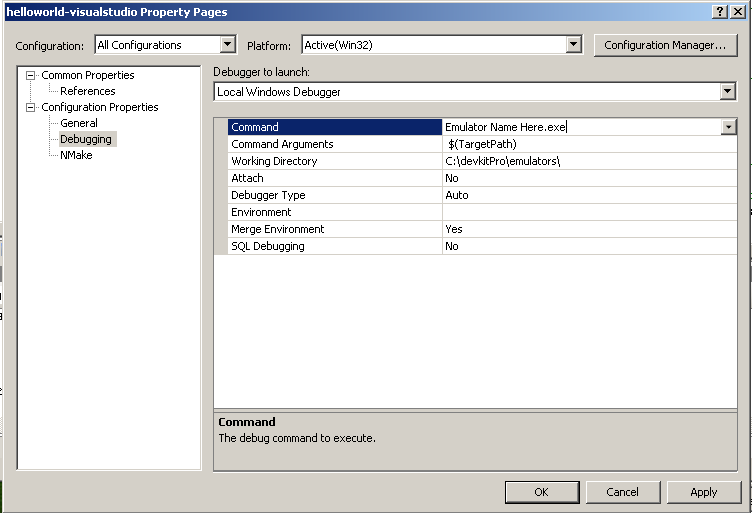
Finally, to set up your emulator to launch on project debug select the “Debugging Category” under “Configuration Properties”.
In this section you should be able to select your emulator command, arguments, and working directory.
Set “Command” to the emulator executable, set the “Command Arguments” to “$(TargetPath)” and set the “Working Directory” to the full path to the executable.
Click ok and you should now have a fully functional Solution complete with IntelliSense and debug to emulator!